
前言
搭建一个个人博客需要什么呢?
唯一需要的就是 耐心 、 坚持
你需要在遇到问题时自己去网上查找答案,有时候一个问题就要查半天
最后还有可能没解决,但是当问题解决时的满足感令人愉悦
环境准备
本教程主要面向
Windows用户
- 操作系统:Windows11
- Node.js
- Git
- Hexo
- idea
- 一个 GitHub 帐号
- 一个云服务器(可选)
- 一个域名(可选)
安装Node.js和Git
Node.js https://nodejs.org
- Windows:通过
nvs(推荐)或者nvm安装。 - Mac:使用
Homebrew或MacPorts安装。 - Linux(DEB/RPM-based):从
NodeSource安装。 - 其它:使用相应的软件包管理器进行安装,可以参考由
Node.js提供的指导。
- Windows:下载并安装
git。 - Mac:使用
Homebrew,MacPorts或者下载安装程序。 - Linux(Ubuntu,Debian):
sudo apt-get install git-core - Linux(Fedora,Red Hat,CentOS):
sudo yum install git-core
安装 Hexo
官方网址: https://hexo.io/zh-cn/
首先需要建立博客文件夹,建议建在非系统盘,例如
~D:/Blogroot/,那么这个目录就是我们博客的根目录了。
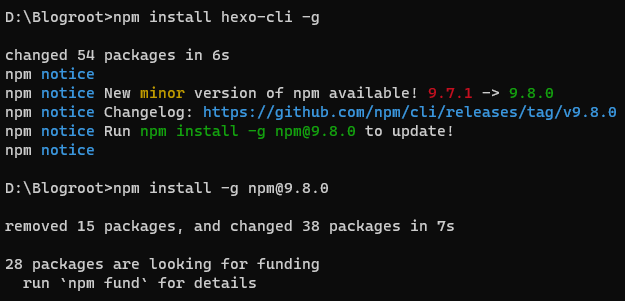
因为每个人的命名习惯不同,本帖之后会以 [Blogroot] 指代博客根目录。使用 npm 安装 Hexo, 在 [Blogroot] 路径下右键 ->Git Bash Here, 输入
1 | npm config set registry https://registry.npm.taobao.org |
- 初始化 Hexo 博客:
1 | # 本地创建一个目录用于存放博客 |

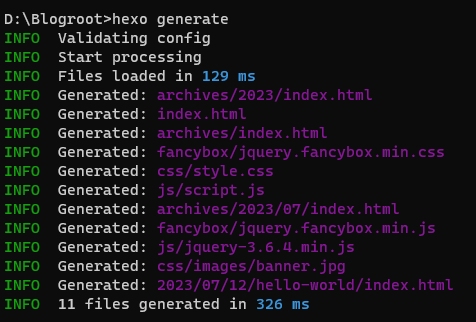

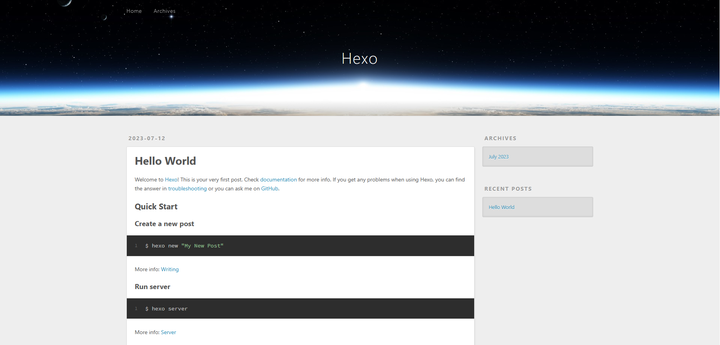
然后在浏览器中打开 localhost:4000 , 如下,说明你的博客已经构建成功了
注册 GitHub 帐号
- 进入官网 https://github.com/
- 点击右上角的 Sign up(注册)
- 填写自己的邮箱、密码、用户名等信息,然后用邮箱验证即可完成。
创建 GitHub 仓库
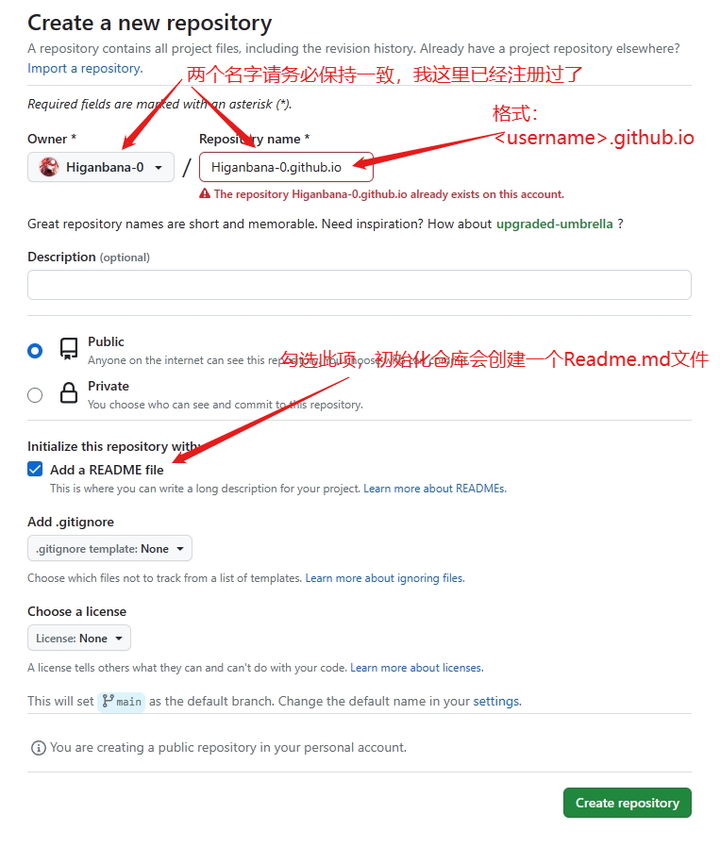
点击右上角的+按钮,选择New repository,创建一个<用户名>.github.io的仓库。
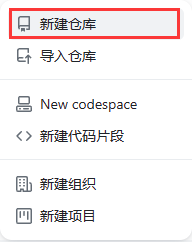
找不到创建入口的,访问:https://github.com/new
仓库的格式必须为:<用户名>.github.ioDescription:为描述仓库(选填)
勾选 Initialize this repository with a README 初始化一个 README.md 文件
点击 Creat repository 进行创建
配置 Git 与 GitHub
此处为全局配置,所以可以在任意位置打开git bash, 设置用户名称和邮件地址
1 | git config --global user.name "user name" |
在本地客户端生成公共密钥:
1 | ## 执行完之后一直回车就行 |
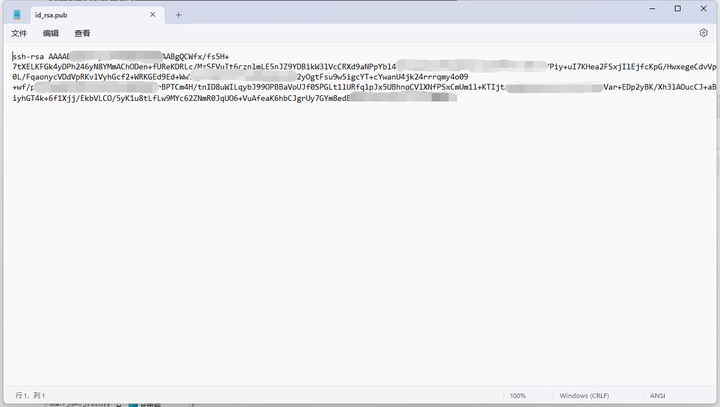
本地获取公钥
查看本机的公钥
Linux 系统:~ /.ssh
Mac 系统:~ /.ssh
Windows 11 :C:/Users/XXX(一般是你电脑的命名)/.ssh

用记事本打开公钥,复制里面的内容
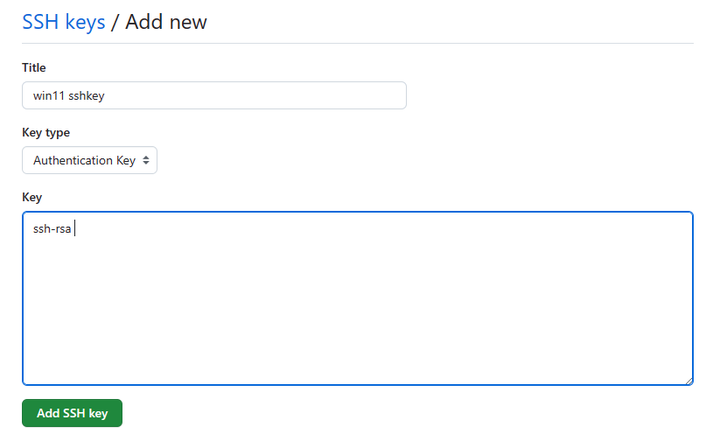
将 SSH keys 保存到Github
打开 github 点击头像 ->settings, 在设置页面找到 SSH and GPG keys,单击 New SSH key 新建 SSH KEY。
保存 SSH keys
测试 sshkey 是否添加成功
在 git bash 测试 sshkey 是否添加成功,输入
1 | ssh -T git@github.com |
第一次连接测试需要输入 yes,正常输出是:
1 | The authenticity of host 'github.com (x.x.x.x)' can't be established. |
将静态博客挂载到 GitHub Pages
安装 hexo-deployer-git
1 | npm install hexo-deployer-git --save |
修改 deploy 配置项
打开 [Blogroot]/_config.yml, 修改底部的 deploy 配置项
1 | deploy: |
内容提交
若以上内容已经准确配置,把本地 hexo 博客内容提交到 git 仓库
1 | hexo clean |
- hexo clean:删除之前生成的文件,若未生成过静态文件,可忽略此命令。
- hexo generate:生成静态文章,可以用hexo g缩写
- hexo deploy:部署文章,可以用hexo d缩写
至此,所有的准备工作告一段落
 微信
微信- 支付宝


lingxian_qiuwan
3418013863


